Saturday, July 8, 2017
Disabling Windows 10 Update Uploading
Disabling Windows 10 Update Uploading
Here is how to disable that feature:
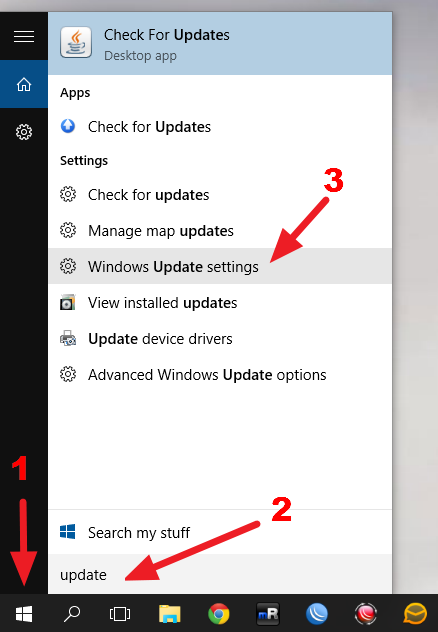
Step 1:
- Click on the Start Menu
- In the search bar, type "update"
- Select "Windows Update Settings"
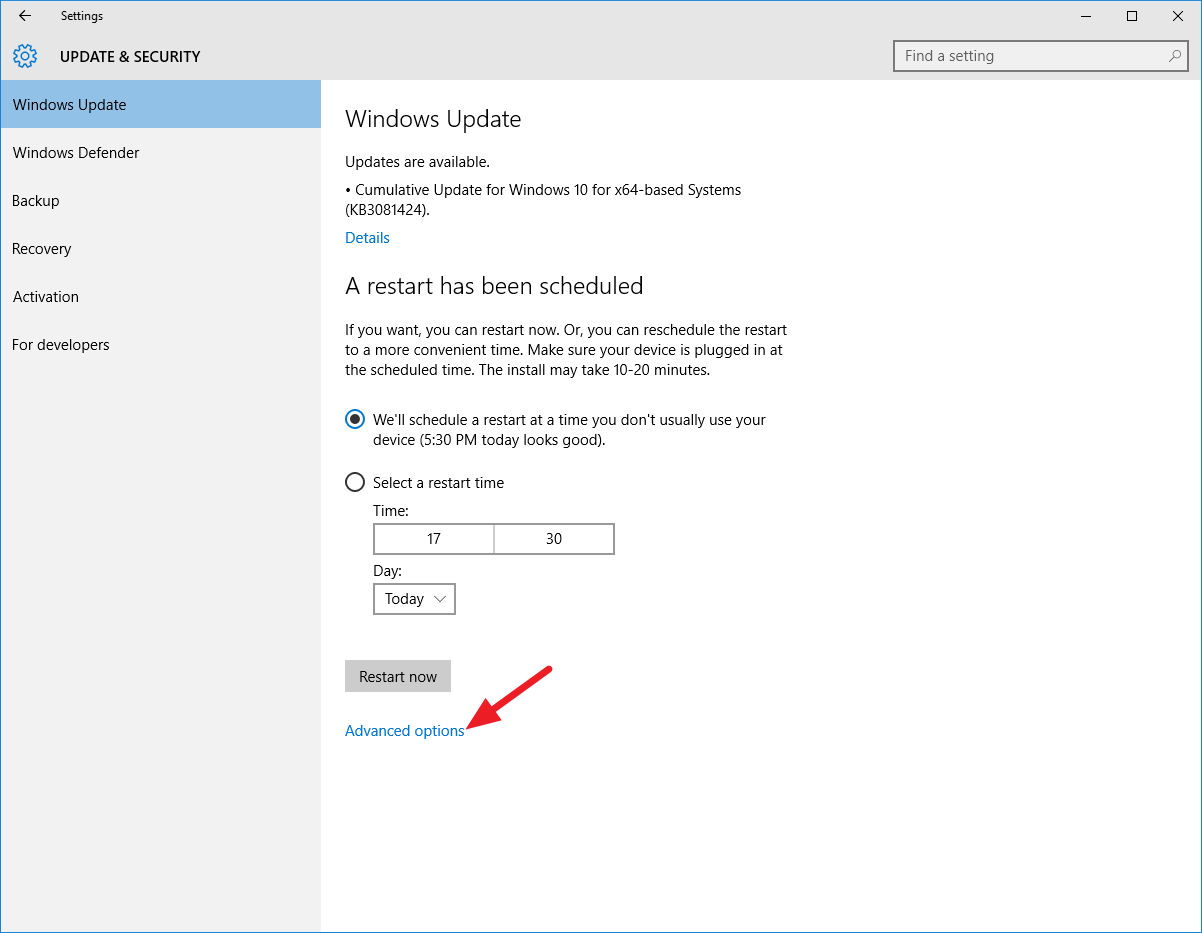
Step 2
- Click on the option that reads "Advanced Options"
Step 3
- Click on "Choose how updates are delivered"
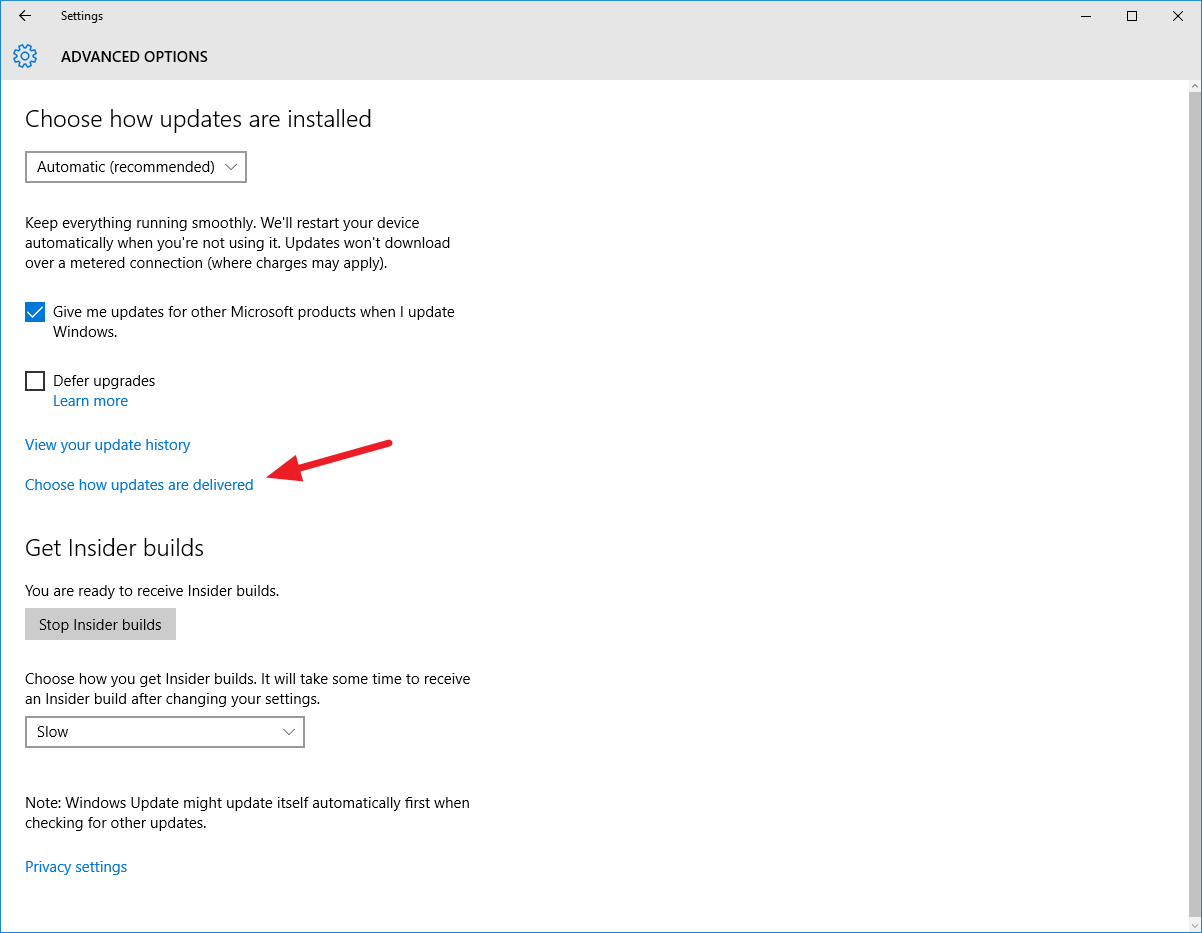
Step 4
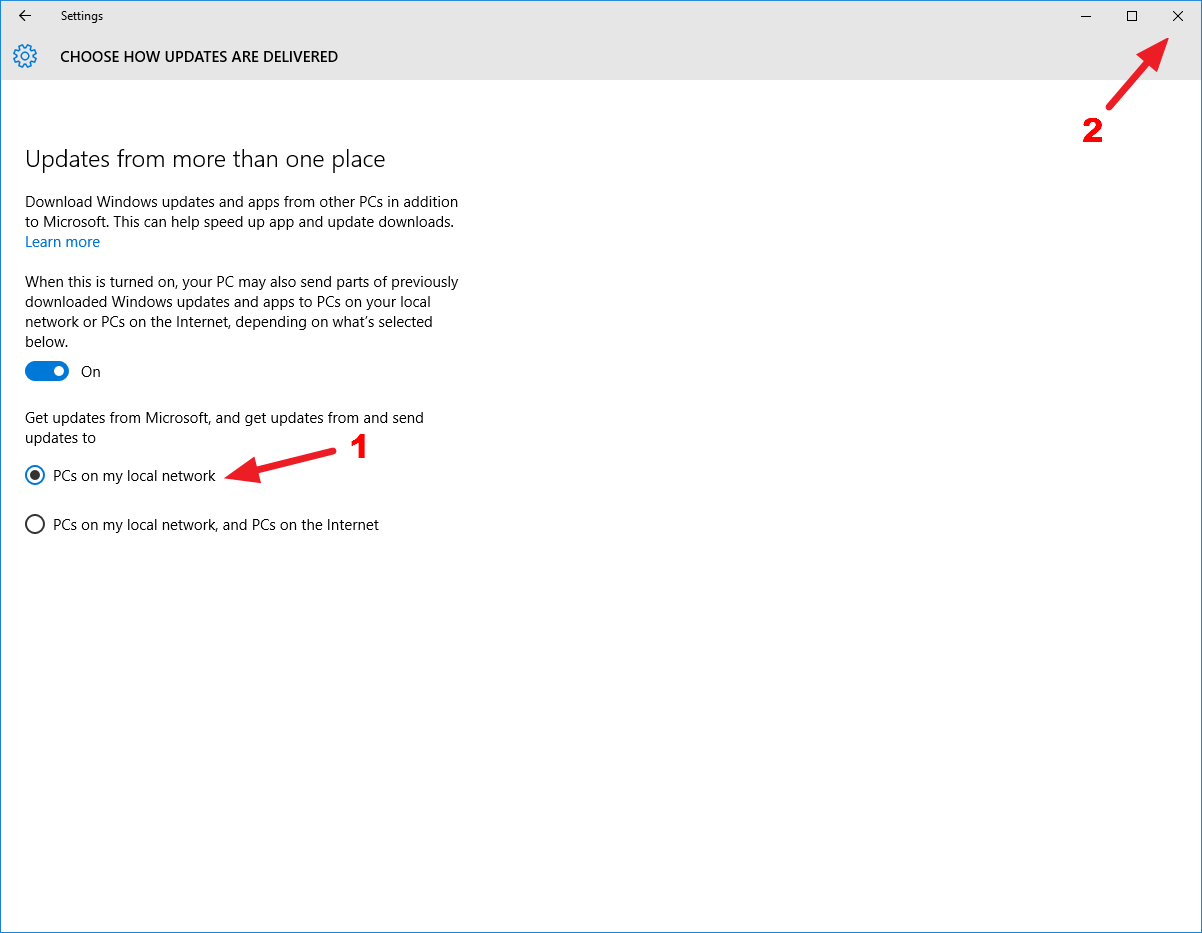
Read the information to get an understanding of the options. My recommendation is that you set up the computer to send updates to PCs on the local network. This will actually save you some bandwidth if you have multiple computers running Windows 10 on your local network.
- Select the option that works for you (or turn of update sharing all together).
- Close the update settings window to apply changes.
Subscribe to:
Post Comments (Atom)
No comments:
Post a Comment
Note: Only a member of this blog may post a comment.